I started preparing for this project about one month ago, but then I was derailed by YouTube when they announced that they will no longer provide the real subscriber count but the closest rounded number. At the moment, that is not really an issue for me as I have less than 1000 subscribers, but the more subscribers you have, the more it becomes an issue.
However, I was not demotivated and I set to find a solution. Two weeks later, YouTube Sight was born.
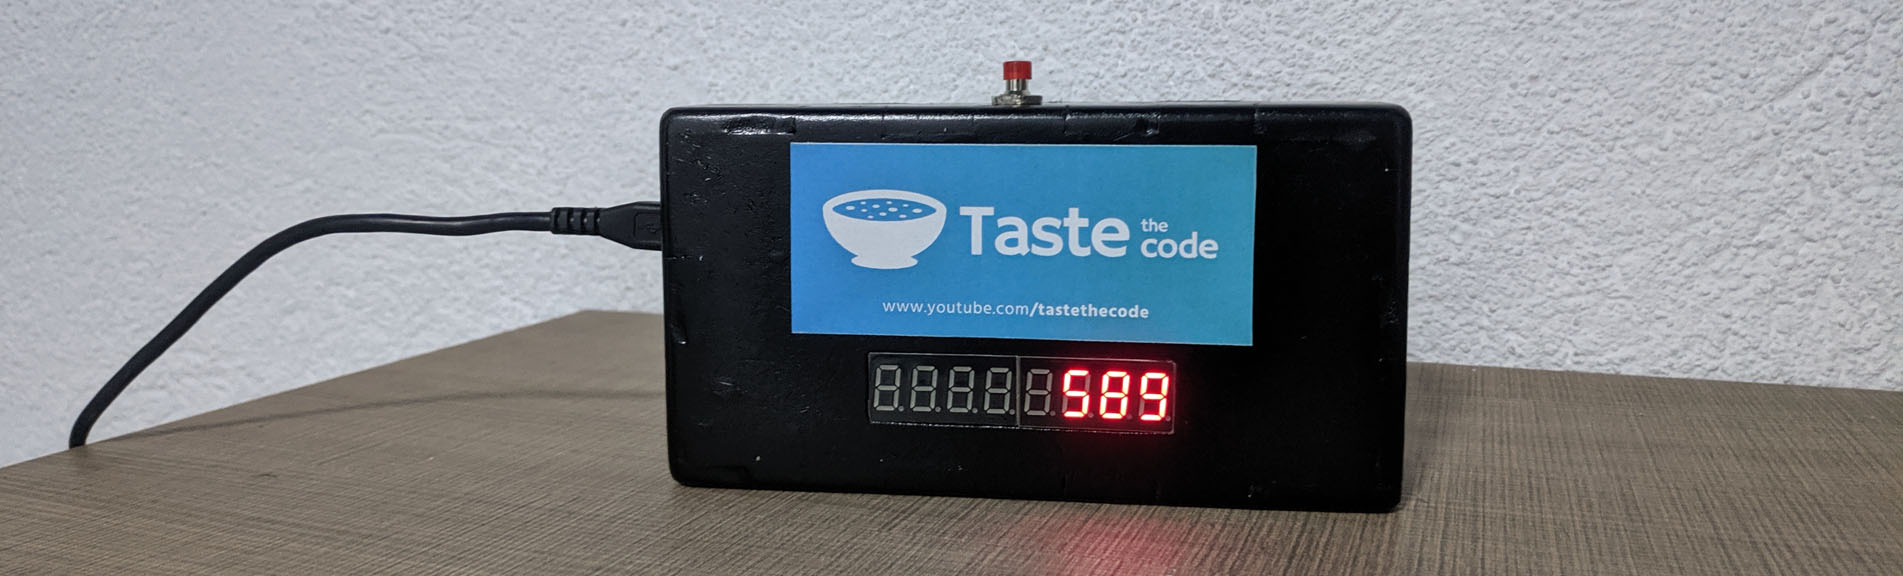
YouTube Sight is a service that you can connect to with your YouTube channel account and it will provide you with a URL from which you can extract the full subscriber count and use it in your project.
So far, I’ve provided an example sketch for how you can use YouTube Sight, built an Arduino library for it and today with its help, I will create a fully working subscriber counter for my channel.
A nice little feature of the counter is that when you press on the button it will show the number of subscribers needed to reach the next milestone.
For the project enclosure, I wanted to make a box with finger joints just to try out the process. To design it, I’ve used a site called MakerCase that once you specify the box dimensions it will give you a template that is primarily intended for use with a CNC machine. I took that template and printed it on a piece of paper and stuck it to a 6mm MDF board.
I did the rough cutting with a jigsaw and then proceeded with cutting directly on the line with a coping saw. Although it worked and I managed to cut all of the pieces, this took forever. A CNC or a laser cutter would have been perfect to be used for such a project but I do not own one. If you like this project maybe you can help me get one?
Once all of the pieces were cut, I’ve glued all of the sides except for the back and I’ve clamped it tight. Once the glue was dry, I’ve used a sanding block to even out all of the sides and around the corners.
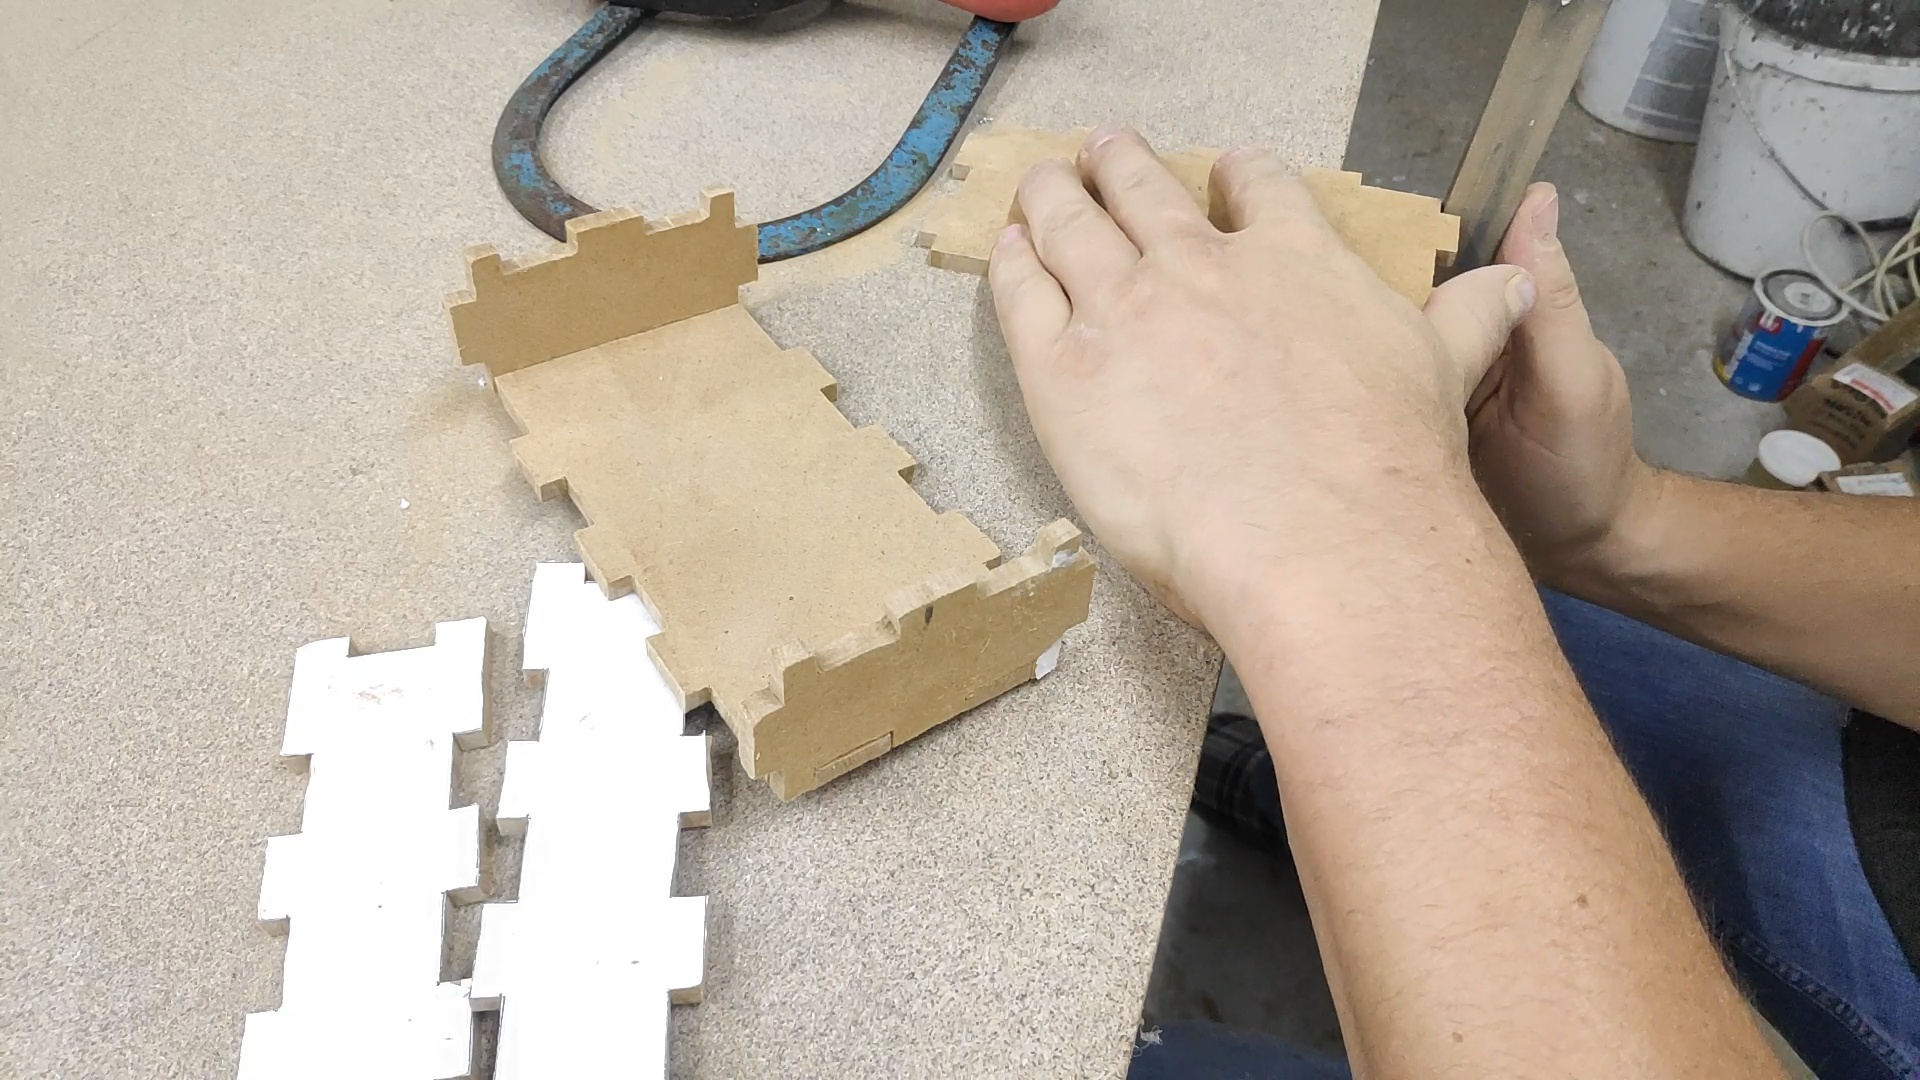
Refining the fingers on the box joints for the case
At some of the joints, there were gaps so I used a bit of the wood glue with the sanding dust to fill them.
In total, I did three cutouts on the box. One for the screen at the front of the box, one for the button on the top and another one on the side where the USB connector of the boar will be so a cable can go through. This cable will be used for both programming the board and power it on externally.
In the end, I used two coats of matt black spray paint but I’m not really pleased with the finished look. I kinda rushed and didn't do a good job sanding the box which at the end showed on the finished box. However since it is black, the imperfections are only visible from up close and it looks quite good from a bit of a distance.
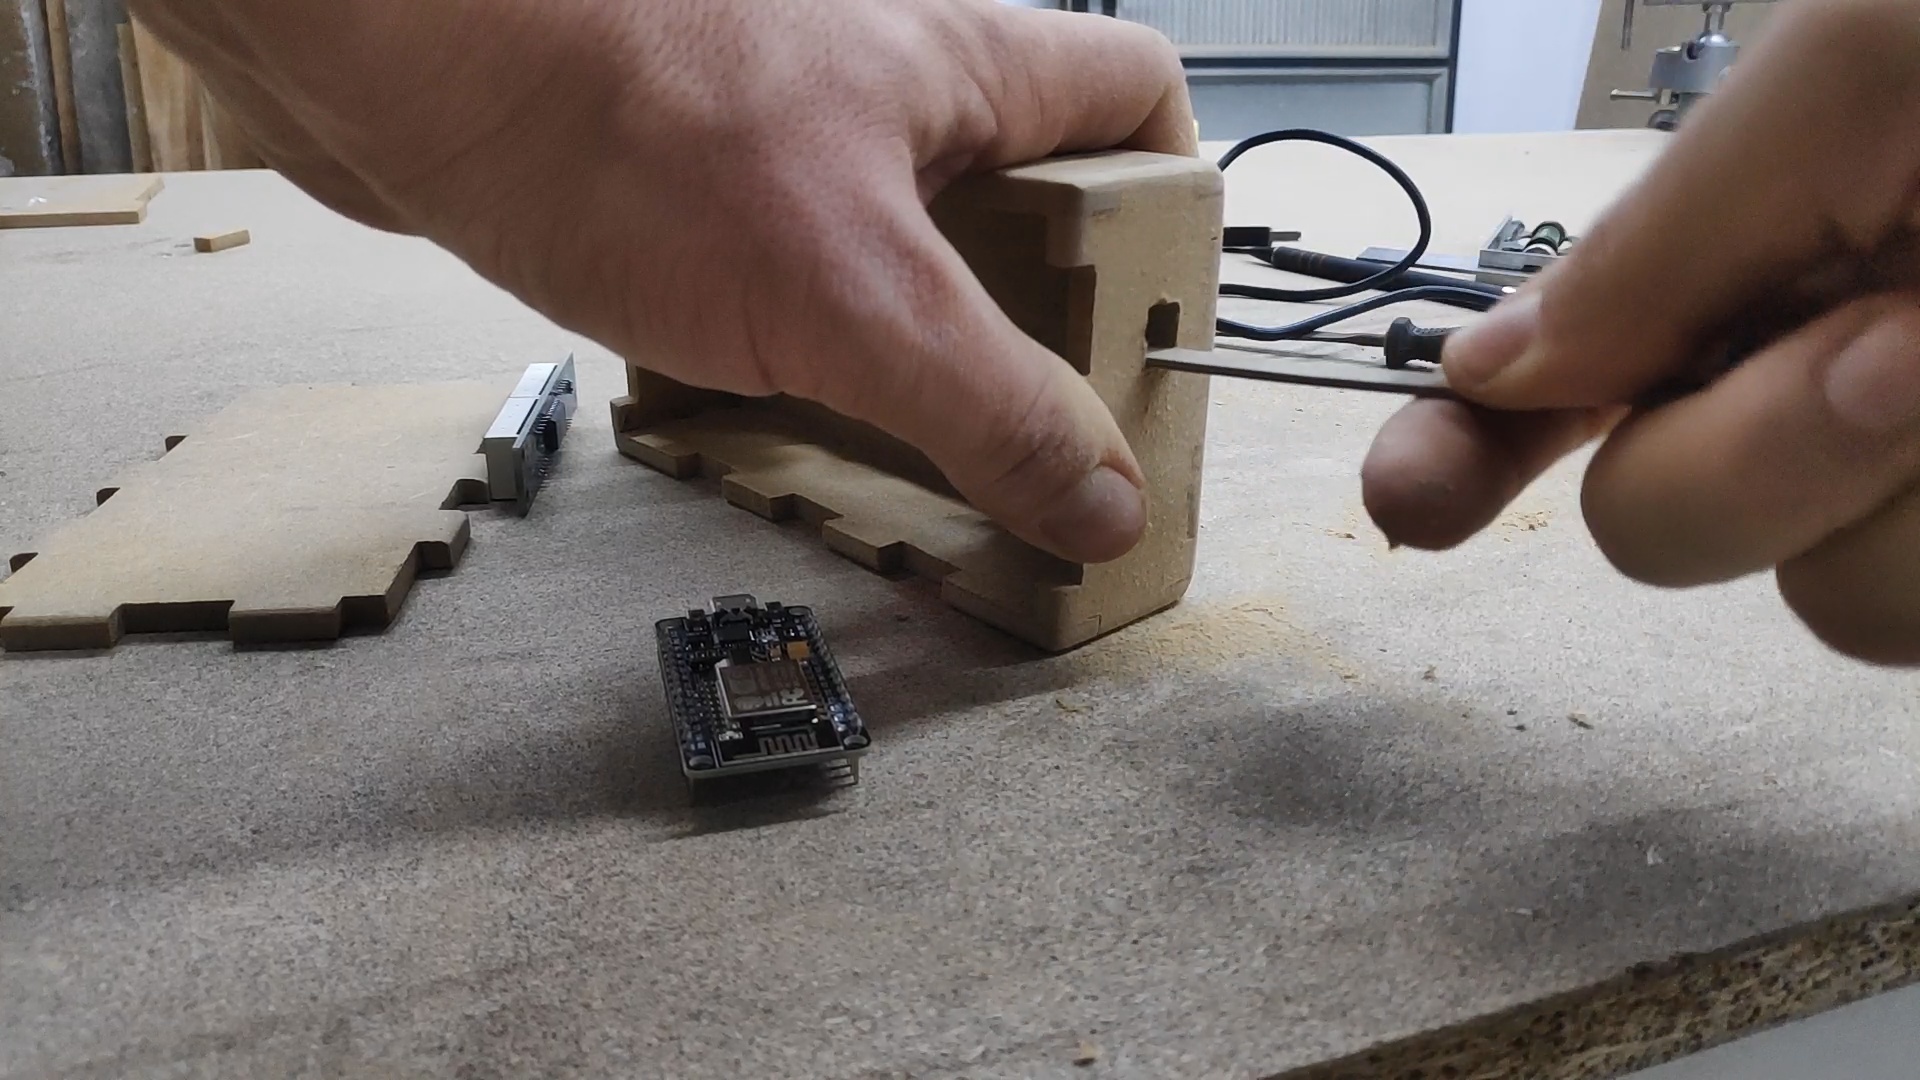
Preparing the cutouts for the display, the cable and the push button.
With the box finished, I moved to my electronics desk and I’ve soldered wires first to the display module and then I've soldered the wires to the NodeMCU board. The wiring is quite simple and the connections need to be matched based on the following table.
VCC -> 3V3
GND -> GND
DIN -> D8
CS -> D6
CLK -> D7
The switch is connected between VCC and D2 with a pull-down resistor to ground. The full schematic can be found on EasyEDA.

The electronics inside the box
The code has several working parts for each of the connected parts. The statistics for the channel are retrieved with the help of YouTube Sight. YouTube Sight is a tool that I’ve created from which you can retrieve the full subscriber count from YouTube.
In order to use it, you will need to connect your YouTube account with it and retrieve the generated GUID from the end of the API URL. This is then replaced in the example sketch along with the WiFi settings.
To display the retrieved data on the 7 segment display, there is a function called “displayString” that will show the count.
Additional, a small portion of the code handles the push of the button, on which the missing count for the next subscriber milestone is calculated and displayed.
The full code is available for download from GitHub.
All of the pieces are put inside the box and they are held in place with hot glue. The back piece of the box is just press-fitted and this can allow for later access to the electronics in case something gets faulty.
I hope that this article was interesting and educational for you. In case you are a YouTuber a subscriber counter like this is a must. It is a fun project that can introduce anyone into electronics and coding. If you made one, please let me know! I would love to see your creations.
Thank you for your attention and don't forget to subscribe!


