
To heat my home, I use wood pellets and a big pellet boiler, that I need to top up every few days. This is usually not an issue but sometimes, a few days can go by where I forgot to top it up and I will only realize that once I start to feel a bit cold in the house because the boiler was left without pellets.
Again, this is not that big of an issue as it is an action that I need to do once every 4~5 days, but it will be much nicer if I can be reminded to top it up based on the amount of pellets spent in the past days. This will make this chore as efficient as possible and I can also use it to track my spending and how much the boiler uses.
So, with this in mind, my idea is to create a device to monitor pellet levels and integrate it with Home Assistant for notifications.
Project Video
I recorded a video of the project on my YouTube channel, so if watching is your thing, feel free to watch it or continue reading if you want to get all the other details.
Working Principle
The device uses an HC-SR04 Ultrasonic distance measuring sensor mounted on the lid of the storage tank from the pellet boiler. This sensor looks down on the pellets and as they are spent, it continuously measures the distance between it and the pellets. With the pellets being spent, they will go lower and the distance will increase.
The HC-SR04 sensor uses very high-frequency sound waves that are sent from one of the transducers, bounced back from an obstacle in front of it, and then received by the other. By measuring the time it takes for those sound waves to travel from and to the sensor, it then calculates the distance between it and whatever is in front of it.
Once we know the distance, we can measure the distances of the full and empty tank and we can map that distance in the form of a percentage of how full the tank is.
Connecting the hardware
The device is controlled by an ESP8266, in the form of a Wemos D1 Mini board. This is a super small and functional development board that can be programmed with the Arduino IDE as well as with ESPHome for later use with Home Assistant.
The HC-SR04 sensor uses 4 wires. To provide power to it, VCC is connected to the 5V pin on the D1 Mini board and GND is connected to GND. The other two pins, Echo and Trigger, are connected to a digital input pin on the microcontroller and one to an output pin. For the Trigger pin, I used the D6 pin, set as an output, and this is the pin we will use to send out the sound pulses. The Echo pin is connected to D7 on the microcontroller and with it, we listen for the bounced sound to figure out how long it took to bounce back.
The HC-SR04 sensor will also work on 3.3V, but since we have it available, 5V will provide a much more stable reading and won't harm the sensor or the microcontroller.
Testing the sensor with Arduino code
I wanted to make sure that the sensor works reliably before I connect it to ESPHome, and I also wanted to provide you with an example of how to use it with the Arduino IDE so I first wrote a simple sketch that outputs the measured distance to the serial console. The full code is available below.
const int trigPin = D6;
const int echoPin = D7;

//define sound velocity in cm/uS
#define SOUND_VELOCITY 0.034
#define CM_TO_INCH 0.393701

long duration;
float distanceCm;
float distanceInch;

void setup() {
  Serial.begin(115200);
  pinMode(trigPin, OUTPUT);
  pinMode(echoPin, INPUT);
}

void loop() {
  digitalWrite(trigPin, LOW);
  delayMicroseconds(2);
  digitalWrite(trigPin, HIGH);
  delayMicroseconds(10);
  digitalWrite(trigPin, LOW);

  duration = pulseIn(echoPin, HIGH);

  // Calculate the distance
  distanceCm = duration * SOUND_VELOCITY/2;

  // Convert to inches
  distanceInch = distanceCm * CM_TO_INCH;

  // Prints the distance on the Serial Monitor
  Serial.print("Distance (cm): ");
  Serial.println(distanceCm);
  Serial.print("Distance (inch): ");
  Serial.println(distanceInch);

  delay(1000);
}
This worked as expected and I was able to successfully measure the distance so I continued to install ESPHome on the Wemos D1 Mini board and connect it to my Home Assistant setup.
Integrating with Home Assistant
I installed ESPHome through the web installer and once the device was ready, I adopted it to my existing Home Assistant setup. This is fairly easy and there are plenty of tutorials out there on how to do it.
Once the device was ready, I edited its configuration to add the integration for the ultrasonic sensor, keeping the same D6 and D7 connections, so no modifications were made to the hardware. This integration works well and I was immediately able to read out the distance measured, but I still needed to convert this to a percentage level of how full the tank is.
To do so, I added one more template sensor, where I implemented an equivalent of the Arduino map function. With it, I set the minimum distance to 0.1m and the maximum to 0.8m. When the sensor measures 10 or less cm, I indicate that the tank is full and when it measures 80 cm or more, I indicate that it is full.
Since the distances can go to more than these values, for anything outside this range I just cap the values to 0 and 100%.
The final configuration code looks like this:
sensor:
  - platform: ultrasonic
    id: distance_sensor
    trigger_pin: D6
    echo_pin: D7
    name: "Ultrasonic Sensor"
    update_interval: 60s
    filters:
      - median

  - platform: template
    id: level
    name: Pellet Level
    unit_of_measurement: '%'
    update_interval: 60s
    lambda: |-
      auto r = (id(distance_sensor).state - 0.8) * (100.0 - 0.0) / (0.1 - 0.8) + 0.0;
      if (r > 100) return 100;
      if (r < 0) return 0;
      return r;
Since the measurements don't need to be done that often, I set the update interval to 60 seconds, and I also added a median filter function so the final value is smooth out to the average of the last 5 measurements.
Creating an enclosure
The easiest way to create an enclosure would be with a 3D printer, but since I do not own one, I looked at my junk drawer and found a box from an LED power supply that fits the sensor perfectly. I drilled two holes for the transducers and I also added two small magnets on its back to later mount the sensor to the underside of the metal lid of the pellets storage tank.
To house the Wemos D1 Mini board, I used an electrical box, where I first routed both the cable from the sensor as well as the cable from the 5V mobile phone charger that I will use to keep the sensor powered at all times.
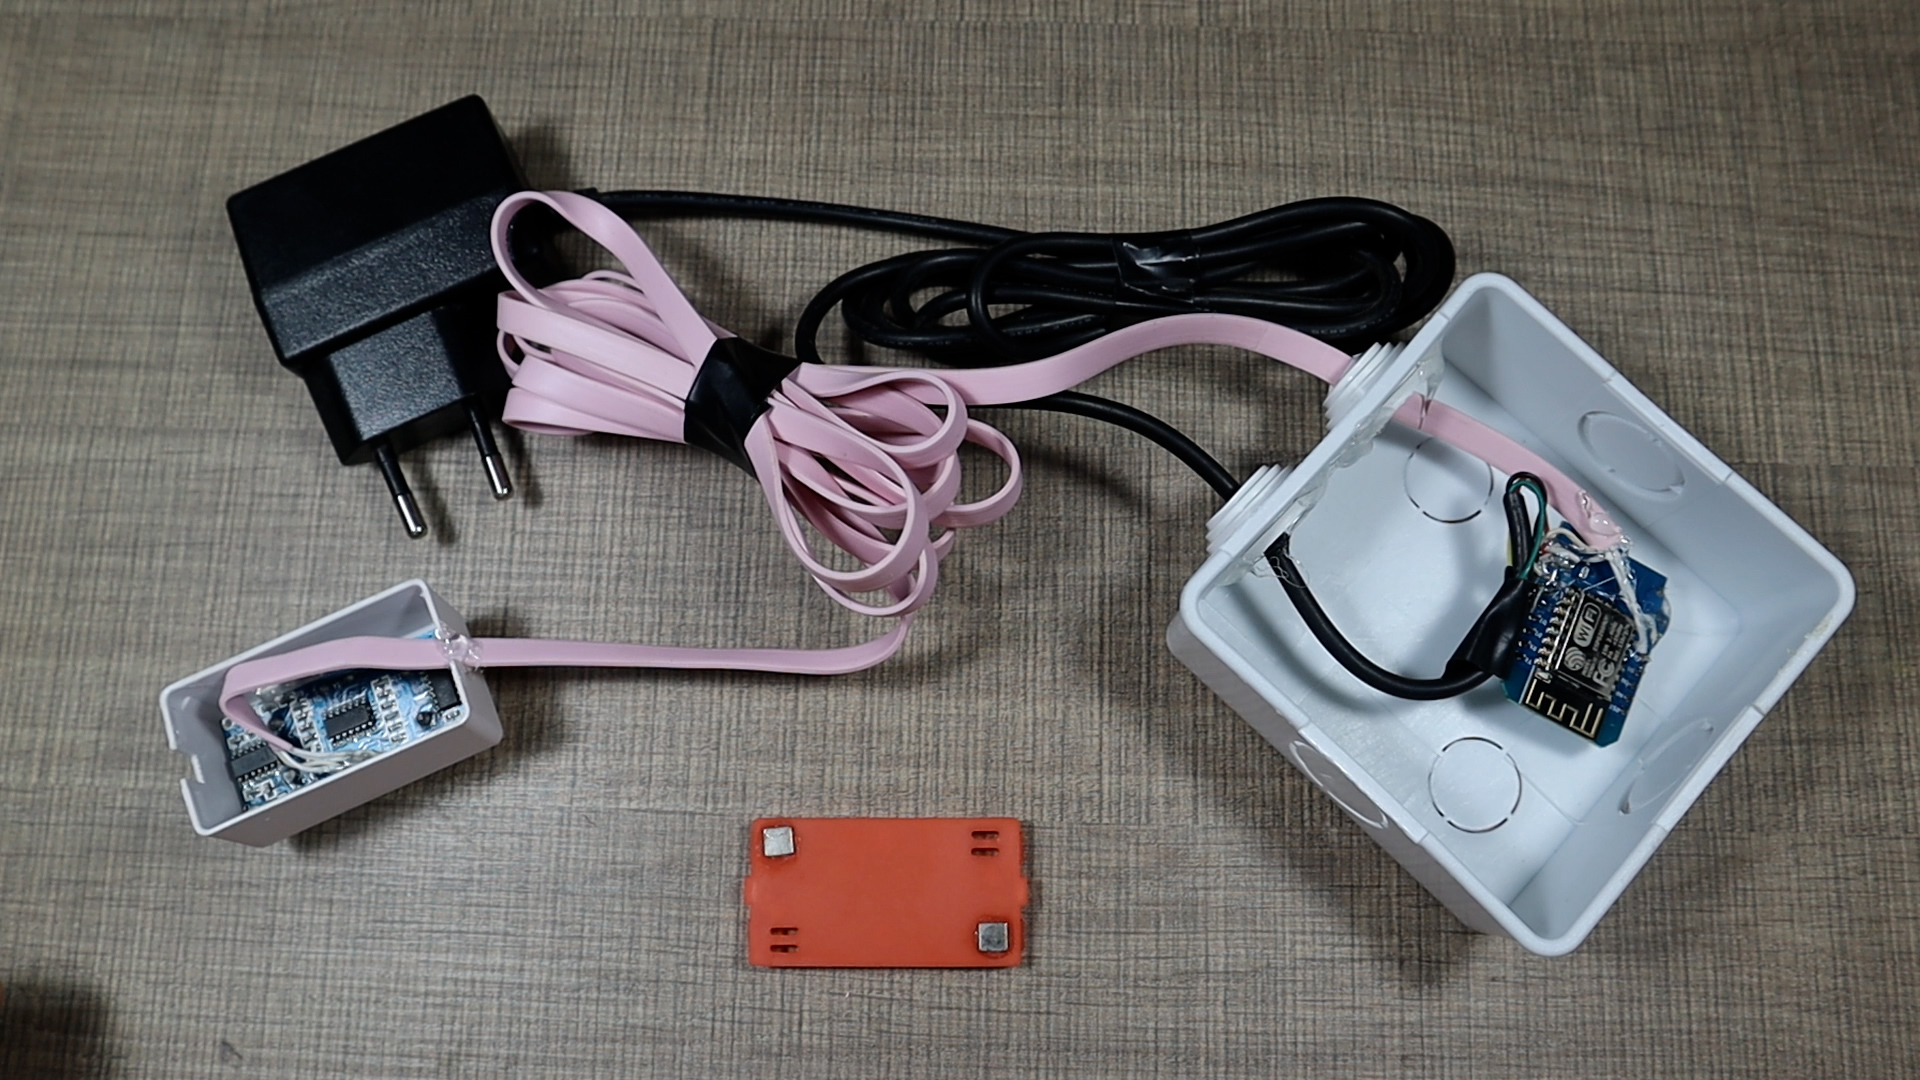
The final look of the finished sensor before mounting
Installation and Calibration
The installation of the sensor was quite straightforward. I stuck the sensor part in the center of the pellet storage tank with the help of the magnets I glued earlier, and I routed the flat wire outside through the back of the lid.
The electrical box was simply placed on top of the boiler and this is crucial that they are separate as there wouldn't be much of a signal strength for the WiFi if we had mounted them together inside the tank.
I will keep the device for now as is with 0.1m and 0.8m as the set minimum and maximum and I will adjust these if necessary depending on how the reading goes in the next few days.
To present the data in my dashboard, I created a gauge card that uses the mapped percentage value as it source and nicely shows this data on it. The configuration for the gauge is as follows:
- type: gauge
      entity: sensor.esphome_web_cd375f_pellet_level
      name: Pellet Level
      min: 0
      max: 100
      needle: true
      severity:
       green: 30
       yellow: 15
       red: 0
Next Steps
With the sensor installed, I'm very pleased with the result, especially on the final mounting with the magnets, as we did not do any modification to the boiler itself and everything is reversible.
Once I have a clear understanding of how the pellets behave and define a concrete minimum level, I will create a notification within Home Assistant. This will satisfy the initial goal that we set to remind me, only when necessary, to top it up and never forget it anymore, providing a more pleasant environment in my home.
The sensor is relatively simple to implement, so I will encourage anyone to try it out. Whether you're new to Arduino, ESPHome, or DIY electronics in general, this project will provide joy while making and using it.
If you have any questions or suggestions or you just want to share your experiences, leave a comment below and I will be more than happy to reply.
Tools and Materials
Below I have a list of all the materials and related tools that you might need to implement this project. They are affiliate links, so with any purchase through them, you support my work and the channel, without any additional cost for you. This help is what keeps me going so I am very thankful for it and if you want to help even more, you can consider donating.
- Wemos D1 Mini Development Board - https://s.click.aliexpress.com/e/_EwblUAZ
- HC-SR04 Ultrasonic Distance Sensor - https://s.click.aliexpress.com/e/_onYxR6K
- Mini Breadboards - https://s.click.aliexpress.com/e/_mLh0VXk
- Breadboard Jumprs - https://s.click.aliexpress.com/e/_olhgRAK
- Rework Soldering Station - https://s.click.aliexpress.com/e/_oEHR6NU
- Wire Snips - https://s.click.aliexpress.com/e/_EHCIXWV
- 5V Power Adapater - https://s.click.aliexpress.com/e/_EyuhkQt
- Project Box - https://s.click.aliexpress.com/e/_oneBy6W
- Mini Magnets - https://s.click.aliexpress.com/e/_EJ1fWBT
- Bench Power Supply - https://s.click.aliexpress.com/e/_mtCeT1Y
- Multimeter - https://s.click.aliexpress.com/e/_onYXIzc
- Hot Glue Gun - https://s.click.aliexpress.com/e/_msjOpMI


