
I've opened several LED bulbs on the channel so far and I did the same now that another one has failed on me.
However, unlike the previous ones, this one was a bit different. Instead of using a dedicated constant current driver IC, this LED bulb used a capacitive dropper to reduce the current. This is not a preferred way of driving LEDs but it is for sure the cheapest one.
A capacitive dropper circuit works in a way that uses capacitors in series with the LEDs. On each of the mains sinewave half, a charge builds up on the capacitor and with that, it drops the voltage and the current that can pass through the circuit.
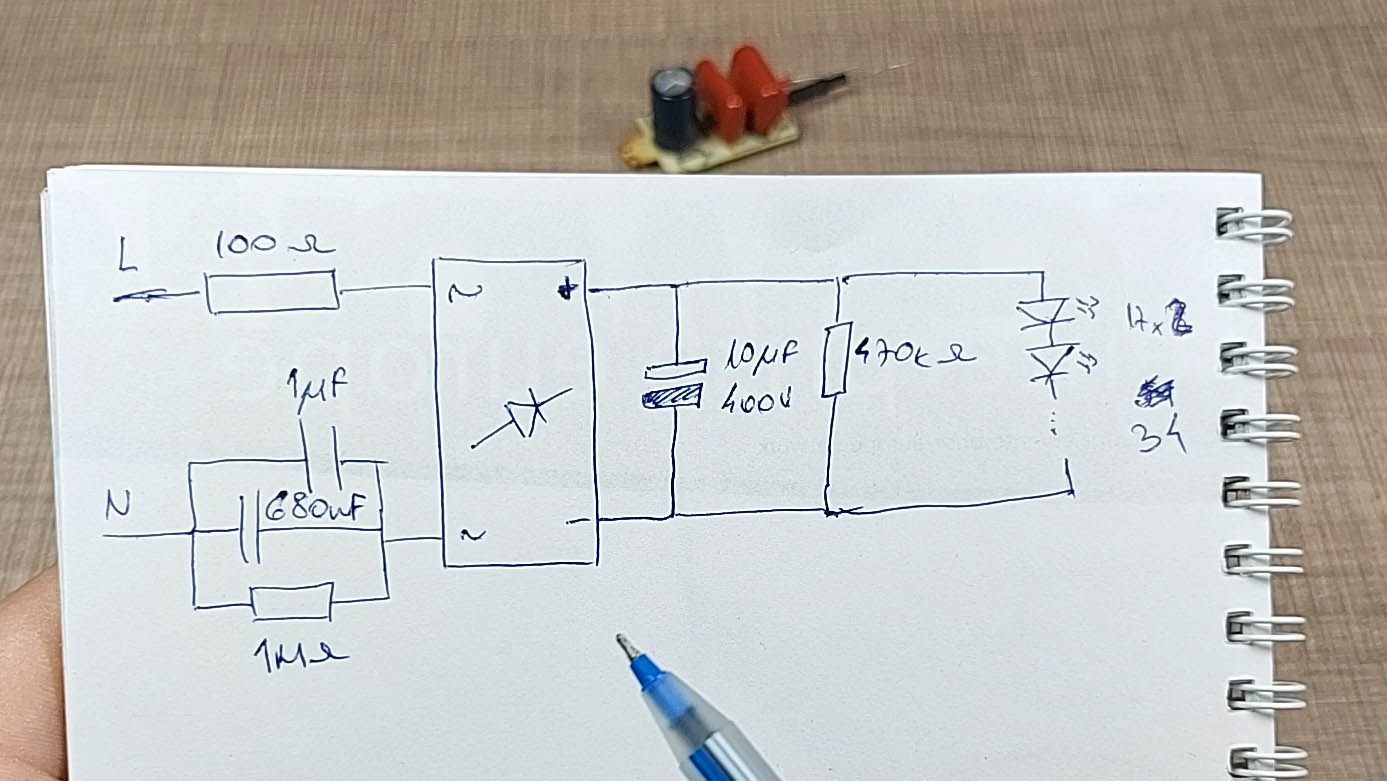
The circuit diagram of the LED bulb
As with the previous LED bulbs, I attempted a repair where I wanted to reduce the current that goes through the LEDs so the resulting light module can then be used in a project. Based on my understanding of the individual LED chip properties, I did some math to calculate a value for a series resistor, and that kind of worked until the resistor started burning.
With a few trials and errors, I managed to reduce the output of the bulb by 4 Watts by removing one of the capacitors in the capacitive dropper.
You can check the entire process on the video below:
Tools and materials used in the video:
- 10W LED Bulb - https://s.click.aliexpress.com/e/_A7Xqi7
- JCD 8898 Soldering station - https://www.banggood.com/custlink/K3vE4gUOEJ
- https://s.click.aliexpress.com/e/_ArwqK3
- Riden RD6012 Power Supply - https://www.banggood.com/custlink/3G3y0ezOyl
- https://s.click.aliexpress.com/e/_AUKv3Z
- Multipurpose screwdriver pen - https://s.click.aliexpress.com/e/_A6Ycd1


